Garden Fence Puppet Show
Create puppets and perform a puppet show to entertain and delight your friends and neighbours, over the fence, or at a window for people who are shielding.
INTRODUCTION
Using recycled materials, create a rod puppet that can be used to perform a puppet show. Puppets really like performing simple stories. An adventure or journey where a character is looking for something is a great story a puppet could tell. The Gruffalo is a good example. There are lots of different cultural stories from around the world that use the quest as its central theme. Find a story- and start with the design of your Hero character- other characters could be performed by soft toys or even people.
WHAT YOU WILL NEED
- Scissors, pliers/wire cutters
- 5mm Cable ties (longer ones)
- Bradawl or other sharp thing for making holes
- Duct tape, sello-tape
- Acrylic or poster Paint and brushes
- Pens & Paper for drawing
- Pva glue, and newspaper/parcel paper
- Wool or other things for decorating
- Old bubble wrap or plastic bags.

For each puppet:
- 3 x bamboo sticks (50cm)
- 2 Large Paper clips or bendable wire
- A recycled cardboard box
- 1 x plastic bottle
STEPS – INSTRUCTIONS
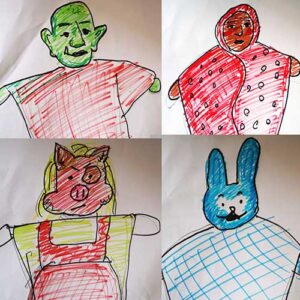 In your design focus on the face of your puppet- think about the character- what are they like? What is their mood? Do they have anything special about them. Think about the shape of their face and how you might make it.
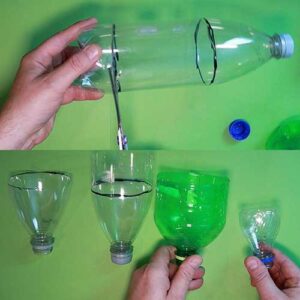 Take a smooth sided drinks bottle (I used a 1 litre one) cut it at the point where the curve of the neck becomes the side of the bottle… and again at the bottom of the bottle (see picture) keep the top and bottom, pop the middle in recycling.
 Make a ball of paper big enough not to go through the neck of the bottle, attach to the end of a bamboo stick with duct tape. Slot the bamboo through bottle so the ball is on the inside- stop any wobbling by inserting card into the neck and tape up.
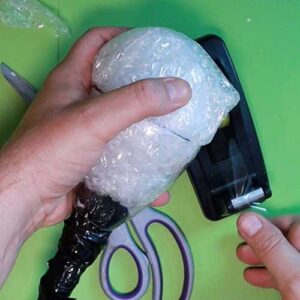 Take some old bubble wrap or bag and make it into a smooth ball that fits into the wide opening where you cut earlier tape it securely to so it doesn’t unfold and tape it into position making sure everything is smooth. This will be the top of your head.
 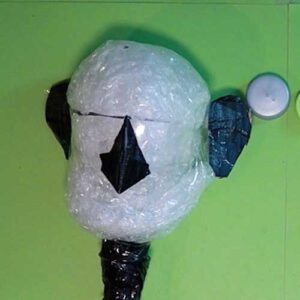 Use bubble wrap or paper to make sausage shapes and positioned as the chin of your puppet. Use gaffa to cover one side of cardboard, draw out ears and a use a triangle of card to become the nose- for younger makers, just add a nose and paint the rest of the features once paper mache stage is complete.
 Cover one side of card with gaffa- draw a mitten or more detailed hand the size of puppets face- cut out and use as template to draw another hand (2 x left), then flip it over and draw two more (2 x right). pva glue the card sides to the matching hands and let dry.
 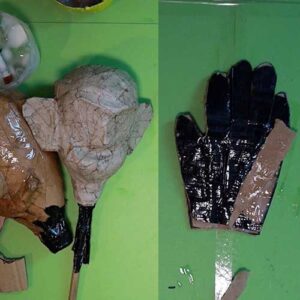 Make sure any paper details on the head have been covered in tape (stops it going soggy) Tear paper or newspaper into thin strip and using pva glue paper mache the head and hands. Let each layer dry before completing the next. Do 3 layers.
 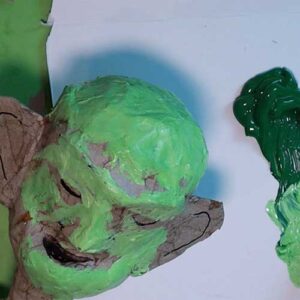 You can paint your puppet any way that you want! I like to give highlights and shadow. I mixed three shades of my puppets skin tones. Paint the head with the middle tone and let it dry off. Paint the hands in the same tones.
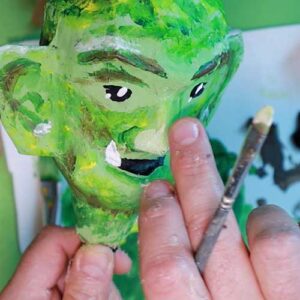 To create shadow, use the darker shade of the puppets skin tone and imagine where the shadows would be cast by light… Stipple or dry brush those areas (by taking some of the paint off the brush and dabbing. Next add highlights- then details. Don’t forget light in the eyes!
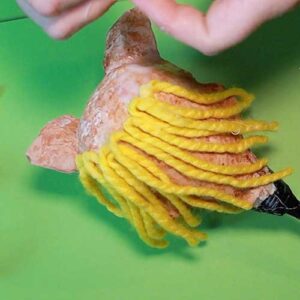 You can add hair and other details like hats (the bottom of the bottle makes a good crown I’ve found) and glue them on.
 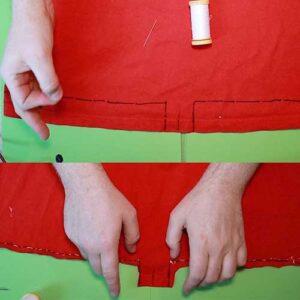 On the t-shirt draw a line 5cm from bottom edge. At the middle draw two vertical lines 5cm apart (a tab) sew along the drawn line to the tab and leave a gap for the neck pole. Cut the sections shown leaving tab. Cut from sleeve to sleeve, to remove neck.
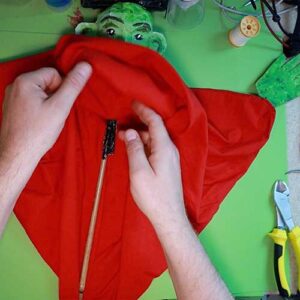 Turn puppet clothing right side out and insert the head pole through the gap making sure the tab is inside the puppet- this is where you will cable tie. Make sure the seams that you have sewn are in line with where the shoulders of the puppet would be.
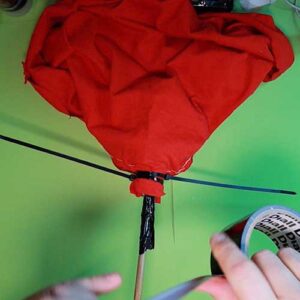 Use two cable ties to secure the tab tightly to the bottle neck of the puppet head. Make sure the cable ties are in line with the seams (I found they gave the arms some nice shape so I left them in) you can cut them off if you choose to.
 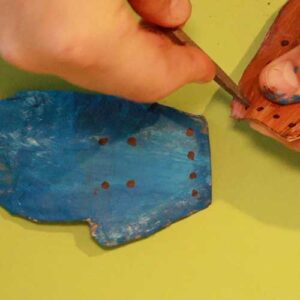 The hands can be shaped so they are less flat use a sharp pointed pencil or bradawl to create holes. 4 at the wrist. And four in the palm as shown. Mark them out first with a pen/pencil.
 Cut the corner of the body cloth where the hands should go and sew them into position using a needle and thread- through the holes at the wrist of the hand. You can sew or pin one of the hands to the puppets body so only one hand moves.
 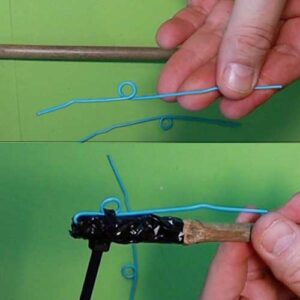 Gaffa tape one end of a bamboo (leave the opening at the tip) Unbend a large paperclip until it’s a long U shape, then using a pencil, create a loop in the wire by winding the paper clip around a pencil. Insert the end of the paper clip into the tip of the bamboo.
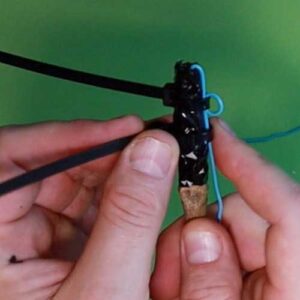 Secure the paper clip loop with cable ties tightly as shown, snip off the tails of the cable ties, and use tape to cover any rough edges.
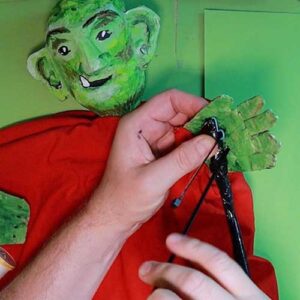 Cable tie the hand to the rod making sure the loop of the paperclip is secured to the hand. Add a second cable tie a little below the loop to help with stability.
Your puppet is now ready for rehearsals! Keep the show as simple as possible, make sure you use a loud voice and most of all HAVE FUN!
LINKS
Twitter: @altscaletheatre
Facebook: @alteredscaletheatre